Banner 468

Facebook
RSS

How To Create A Blogger Archive Page

This method is one of the easiest way to create a separate archive page in blogger. All you have to do is insert 2 lines of code in a Blogger Page and it will automatically generate a list of the entire collection of all your posts, with titles neatly linked and sorted or archived by dates.

It would display all your posts in a single page which would be easily accessible and navigable that provide better options not only to readers and search engines alike, but also as a reference to blog owners.

Step 1:

We will be creating a page first.

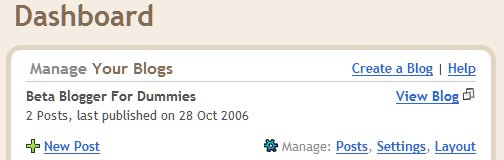
Go to Dashboard > Edit Posts > Select Edit Pages - click on the "New Page" button and type in the Page title, e.g Archives or Sitemap (Any name of your choice, keep it short).

Step 2:

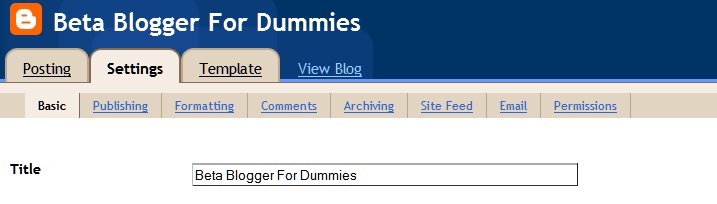
Select the Edit HTML mode to prepare your post. Copy and paste the following code into the post box :

<script style="text/javascript" src="http://abu-farhan.com/script/daftarisibloggerarchive/tocbyarchivemin.js">
</script>
<script src="http://Boost4Blogger.blogspot.com/feeds/posts/default?max-results=500&alt=json-in-script&callback=loadtoc">
</script>

(Do not forget to replace Boost4Blogger.blogspot.com by your blog URL).


Now click "Publish Page", Done! Once it is published, "Archives" tab will appear under your blog's header.

> Note: You can increase/decrease the number of items to display by changing the value “max-results=500″ to a different count (optional).

> In Edit HTML mode, you can also add additional paragraph/contents above or below the script code (Optional).
[ Read More ]

How To Create Custom Blogger Recent Posts Widget For Blogspot Blog


With the use of “JSON” and your blogger blogspot blog feed, we will create a custom blogger recent post widget in just few easy steps. Accessing of blog feed is done by using a technology called JSON through a callback.

JSON stand for “JavaScript Object Notation” is a lightweight data-interchange format.

A feed is a data format used for providing users with frequently updated content. Content distributors syndicate a web feed, thereby allowing users to subscribe to it. It gives users a way to keep up with many sites on the web without having to visit each site individually to see if they have updated.

Now, we will process the JSON script and will display the Recent posts in the widget. Please follow the steps below.

1. Login to your Blogger account.
2. Click on Layout.
3. Click on Add a Gadget.
4. Select “HTML/JavaScript”
5. Add the following code in the gadget code section.


<style>
 .recentposts{ padding: 1px; border: 1px solid #000; border-width: 0px;width:380px; display: block; }
 .recentposts a  { border: 1px solid #fff;display: block; text-decoration: none; padding: 5px 2px 5px 5px; color: ##0000CC; font-size: 14px; background: #FFDECE;width:380px; }
 .recentposts ul {width:380px;list-style-type:square;float: left;}
 .recentposts li{list-style: square;margin: 0;font-size:12px;padding: 0px 1px 0px 3px;}

</style>
 <h3>Most Recent Posts</h3>
<div class ="recentposts" id="latestposts"></div>
<script>
  function listEvents(root) {
    var feed = root.feed;
    var entries = feed.entry || [];
    var html = ['<ul>'];
    for (var i = 0; i < entries.length; ++i) {
      var entry = entries[i];
            var posturl;
           for (var k = 0; k < entry.link.length; k++) {
                          if (entry.link[k].rel == 'alternate') {
                                   posturl = entry.link[k].href;
                                   break;
                           }
                 }
                 var title = entry.title.$t;
                 title = "<a href="+posturl+">"+title+"</a>"
        var start = (entry['gd$when']) ? entry['gd$when'][0].startTime : "";  
        html.push('<li>', start, ' ', title, '</li>');
    }
    html.push('</ul>');
    document.getElementById("latestposts").innerHTML = html.join("");
  }
</script>
<script src="http://example.blogspot.com/feeds/posts/default?max-results=10&alt=json-in-script&callback=listEvents">
</script>
<ul>


6. In the above code, don’t forget to change “example.blogspot.com” with your blogspot blog name.

> You can increase/decrease the number of items to display by changing the value “max-results=10″ to a different count (optional).

> You can change the CSS style to your own by changing the code at the beginning and between the tags (optional).

7. Save and View it.

(If you have any question, please refer "Help" tab).
[ Read More ]

How To Change New Template Backgrounds

Figure: Blogger Template Designer

New blogger templates are slightly different from the older templates. In the older templates, you would change the background in the Edit HTML section of your template, under the body {

However, with the new templates, you can change it from the template designer. To change to your own custom background, follow these steps below.

Design > Template Designer > Advanced > Add CSS

Once you are in “Add CSS”, you would place a code like this below.


body-fauxcolumn-outer {
background: url(http://www.example.com/image.png)PV RV;

background-attachment: AV;
}
.body-fauxcolumn-outer div {
background: none;
}


RED: This is the image URL.
BLUE: This is the positioning variable.
ORANGE: This is the repeat variable.
GREEN: This is the attachment variable.

Below is the explanation of the variables and their purpose.

Positioning Variables (PV):

This is the image position in relation to the center of the element (In this case it is your whole screen). You can use any one of these variables below.

* top left
* top center
* top right
* center left
* center center
* center right
* bottom left
* bottom center
* bottom right

Repeat Variables (RV):

This is how the image repeats itself.

*repeat (Repeats Y and X also known as tiled)
*repeat-x (Repeats Horizontal)
*repeat-y (Repeats Vertical)
*no-repeat (No repeat)

Attachment Variables (AV):

This will control if the image moves with the screen when your scroll or stays in place.

*fixed (Stays in place)
*scroll (Scrolls with screen)


After you are done with the code, it may look like this below.


.body-fauxcolumn-outer {
background: url(http://www.example.com/image.png)top center repeat-x;
background-attachment: fixed;
}
.body-fauxcolumn-outer div {
background: none;
}


(Please note that some newer blogger templates may have conflicting elements that may cause the background not working as you wanted).

Here are a few below that I noticed you need to differ from the instructions.  If you are using one of these templates you may have to place the codes below.

Watermark 3 Template:  (Grassy background image)


.main-cap-top .cap-left {
background: none;
}
.main-outer {
background: none;
}
body {
background: none;
}
.main-cap-top .cap-right{
background: none;
}
.body-fauxcolumn-outer {
background: url(http://www.example.com/image.png) PV RV;
background-attachment: AV;


Simple Template and Watermark Template:


body {
background: url(http://www.example.com/image.png) PV RV;
background-attachment: fixed;
}
.body-fauxcolumn-outer .cap-top {
background: url(http://www.example.com/image.png) PV RV;
background-attachment: fixed;
}


The positioning variables and Repeat variables must be the same for both. The attachment must be set to fixed.  You can also use two different images for a custom design. However, to get a single image to display correctly, you must follow the steps accordingly.

(If you have any question, refer to "Help" tab).
[ Read More ]

How To Remove/Hide Post Atom/Home/Older Post


You can Remove/Hide Post Atom/Home/Older Post with just a few lines of coding. You can also choose which links you would like to remove with the “codes” below.

Follow these steps:

Go to Design > Template Designer > Advanced > Add CSS > Input The Codes Below.

  • To Remove Post Atom:

.feed-links, .blog-feeds {
display: none;
}


  • To Remove Home Link:

.home-link {
display: none;
}


  • To Remove Older Post Link:

.blog-pager-older-link {
display: none;
}


  • To Remove Home & Older Post Link:

.blog-pager {
display: none;
}


After you paste one of these codes into the Add CSS box, with the cursor still in the box hit the space bar for it to take effect.

(If you have any question, refer to "Help" tab).
[ Read More ]

How To Set Your Blog Settings


[ Read More ]