Banner 468

Facebook
RSS
Showing posts with label Customize. Show all posts

How To Create Custom Blogger Recent Posts Widget For Blogspot Blog


With the use of “JSON” and your blogger blogspot blog feed, we will create a custom blogger recent post widget in just few easy steps. Accessing of blog feed is done by using a technology called JSON through a callback.

JSON stand for “JavaScript Object Notation” is a lightweight data-interchange format.

A feed is a data format used for providing users with frequently updated content. Content distributors syndicate a web feed, thereby allowing users to subscribe to it. It gives users a way to keep up with many sites on the web without having to visit each site individually to see if they have updated.

Now, we will process the JSON script and will display the Recent posts in the widget. Please follow the steps below.

1. Login to your Blogger account.
2. Click on Layout.
3. Click on Add a Gadget.
4. Select “HTML/JavaScript”
5. Add the following code in the gadget code section.


<style>
 .recentposts{ padding: 1px; border: 1px solid #000; border-width: 0px;width:380px; display: block; }
 .recentposts a  { border: 1px solid #fff;display: block; text-decoration: none; padding: 5px 2px 5px 5px; color: ##0000CC; font-size: 14px; background: #FFDECE;width:380px; }
 .recentposts ul {width:380px;list-style-type:square;float: left;}
 .recentposts li{list-style: square;margin: 0;font-size:12px;padding: 0px 1px 0px 3px;}

</style>
 <h3>Most Recent Posts</h3>
<div class ="recentposts" id="latestposts"></div>
<script>
  function listEvents(root) {
    var feed = root.feed;
    var entries = feed.entry || [];
    var html = ['<ul>'];
    for (var i = 0; i < entries.length; ++i) {
      var entry = entries[i];
            var posturl;
           for (var k = 0; k < entry.link.length; k++) {
                          if (entry.link[k].rel == 'alternate') {
                                   posturl = entry.link[k].href;
                                   break;
                           }
                 }
                 var title = entry.title.$t;
                 title = "<a href="+posturl+">"+title+"</a>"
        var start = (entry['gd$when']) ? entry['gd$when'][0].startTime : "";  
        html.push('<li>', start, ' ', title, '</li>');
    }
    html.push('</ul>');
    document.getElementById("latestposts").innerHTML = html.join("");
  }
</script>
<script src="http://example.blogspot.com/feeds/posts/default?max-results=10&alt=json-in-script&callback=listEvents">
</script>
<ul>


6. In the above code, don’t forget to change “example.blogspot.com” with your blogspot blog name.

> You can increase/decrease the number of items to display by changing the value “max-results=10″ to a different count (optional).

> You can change the CSS style to your own by changing the code at the beginning and between the tags (optional).

7. Save and View it.

(If you have any question, please refer "Help" tab).
[ Read More ]

How To Change New Template Backgrounds

Figure: Blogger Template Designer

New blogger templates are slightly different from the older templates. In the older templates, you would change the background in the Edit HTML section of your template, under the body {

However, with the new templates, you can change it from the template designer. To change to your own custom background, follow these steps below.

Design > Template Designer > Advanced > Add CSS

Once you are in “Add CSS”, you would place a code like this below.


body-fauxcolumn-outer {
background: url(http://www.example.com/image.png)PV RV;

background-attachment: AV;
}
.body-fauxcolumn-outer div {
background: none;
}


RED: This is the image URL.
BLUE: This is the positioning variable.
ORANGE: This is the repeat variable.
GREEN: This is the attachment variable.

Below is the explanation of the variables and their purpose.

Positioning Variables (PV):

This is the image position in relation to the center of the element (In this case it is your whole screen). You can use any one of these variables below.

* top left
* top center
* top right
* center left
* center center
* center right
* bottom left
* bottom center
* bottom right

Repeat Variables (RV):

This is how the image repeats itself.

*repeat (Repeats Y and X also known as tiled)
*repeat-x (Repeats Horizontal)
*repeat-y (Repeats Vertical)
*no-repeat (No repeat)

Attachment Variables (AV):

This will control if the image moves with the screen when your scroll or stays in place.

*fixed (Stays in place)
*scroll (Scrolls with screen)


After you are done with the code, it may look like this below.


.body-fauxcolumn-outer {
background: url(http://www.example.com/image.png)top center repeat-x;
background-attachment: fixed;
}
.body-fauxcolumn-outer div {
background: none;
}


(Please note that some newer blogger templates may have conflicting elements that may cause the background not working as you wanted).

Here are a few below that I noticed you need to differ from the instructions.  If you are using one of these templates you may have to place the codes below.

Watermark 3 Template:  (Grassy background image)


.main-cap-top .cap-left {
background: none;
}
.main-outer {
background: none;
}
body {
background: none;
}
.main-cap-top .cap-right{
background: none;
}
.body-fauxcolumn-outer {
background: url(http://www.example.com/image.png) PV RV;
background-attachment: AV;


Simple Template and Watermark Template:


body {
background: url(http://www.example.com/image.png) PV RV;
background-attachment: fixed;
}
.body-fauxcolumn-outer .cap-top {
background: url(http://www.example.com/image.png) PV RV;
background-attachment: fixed;
}


The positioning variables and Repeat variables must be the same for both. The attachment must be set to fixed.  You can also use two different images for a custom design. However, to get a single image to display correctly, you must follow the steps accordingly.

(If you have any question, refer to "Help" tab).
[ Read More ]

How To Remove/Hide Post Atom/Home/Older Post


You can Remove/Hide Post Atom/Home/Older Post with just a few lines of coding. You can also choose which links you would like to remove with the “codes” below.

Follow these steps:

Go to Design > Template Designer > Advanced > Add CSS > Input The Codes Below.

  • To Remove Post Atom:

.feed-links, .blog-feeds {
display: none;
}


  • To Remove Home Link:

.home-link {
display: none;
}


  • To Remove Older Post Link:

.blog-pager-older-link {
display: none;
}


  • To Remove Home & Older Post Link:

.blog-pager {
display: none;
}


After you paste one of these codes into the Add CSS box, with the cursor still in the box hit the space bar for it to take effect.

(If you have any question, refer to "Help" tab).
[ Read More ]

How To Set Your Blog Settings


[ Read More ]

How To Change Post Order

Change the order of your “Posts” in Beta Blogger

Posts are ordered according to latest posted first on page. Hence the newest posts are first with earlier posts lower down in the order.

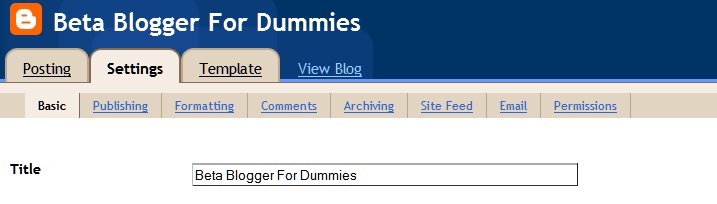
Your blog consist of a Main Page and Post Pages. The Main Page contains the number of posts you have set in Settings > Formatting > Show Posts on Main Page. The rest of the posts are shown as links in the Blog Archive widget in the sidebar. The posts on the Main Page also have their links in the Blog Archive widget. Each Post Page contains only one post.

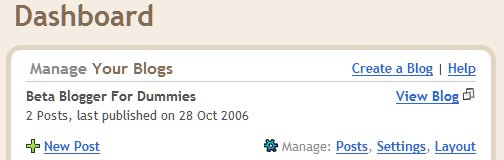
To change this order login to Dashboard. Click on Posts link after 'Manage' under the name of your blog. You will see a list of all your posts with links to Edit, View or Delete them. Click on Edit link of the post you want to change the date.


The Posts Editor opens with its two modes: Edit HTML and Compose. The second mode is present only if you have enabled it in Settings as described in Set Settings. The bottom frame of the Posts Editor contains a link 'Post Options'. Click on it to expand the frame as shown in the image. In the expanded frame you can change the Posts Date and time.


STICKY POST AT THE TOP

If you want this post to be the first post always in your blog then set the date to any time as far in the future as it will allow it to be set. This is because once that day arrives and you post more posts this post will start migrating downwards like the rest. Till then it will remain a "sticky" post at the top of your blog.

This is frequently used by bloggers who wish to post a book with chapters and all in their blog and want the first post to be a "Table of Contents". To see an example see here. Also you should have Post Pages enabled by going to Settings > Archiving.


HIDE POSTS

If you have made a post like a 'Privacy Policy' post which you do not want to show on the Main Page backdate it. Then it will appear as a link in the Blog Archive widget.

(If you have any question, click the HELP tab)
[ Read More ]